Fully expand the folding step unit
Instructions for Port-A-Step
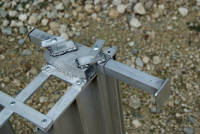
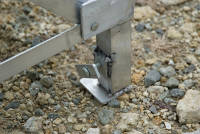
Insert the legs into the step leg bracket from the bottom and tighten securely by hand.
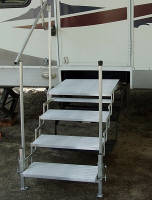
Attach the Port-A-Step unit to the top or next step of your RV depending on height and terrain and pull the step unit to fully extended position. Adjust the legs to desired height where steps are level. Attach the handrail and handpost to their brackets and hand tighten with wing bolts.
To remove simply remove the handrails, lift the unit off and fold for storage.
Instructions for Port-A-Deck
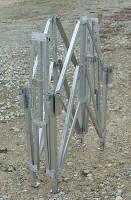
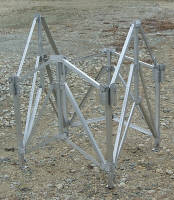
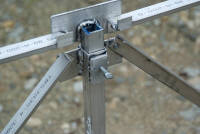

Fully expand the platform structure of the Port-A-Deck
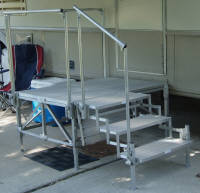
Press down on the center of each side until it rest firmly on top of the sliding center assembly. Position the structure so the 36 inch side that does not have handrail supports is next to the door. The 48 inch side with handrail supports should be toward the back of the trailer and the 36 inch side with handrail supports should be away from the door.
Adjust the height of each leg with the wing bolts so the top is pretty level and the top is between 3 and 8 inches below the bottom of the door.
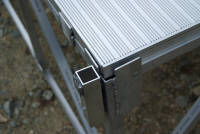
Place the top decks on the structure so that the edge of each structure with the extra support bar is to the center and the edges of both deck pieces rest between the support brackets on each side.
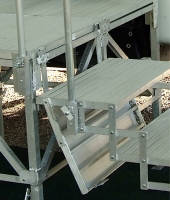
Fully expand the scissor step unit and insert the legs into the leg support bracket from the bottom and tighten with wing bolts.
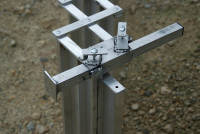
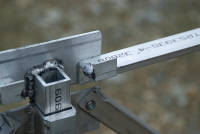
Attach the step attachment bracket to the support structure. The brackte allows the Port-A-Step unit to be attached as a 4 step or 5 step unit by using the top or bottom attachment wings.
The top deck section of the Port-A-Step unit must be folded down when attaching to the deck attachment bracket.
Attach all handrails and make sure all wing bolts are securely tightened.
The Port-A-Step section can be used without the deck when desired.